Showing posts with label patterns. Show all posts

Monday, 14 August 2017

New Pattern

This last weekend, some of my friends who also like to make for various charities decided to have a 'let's make' party, the theme this time was little purses or pencil cases that will be donated and included in shoe boxes for various charities around the world.  My contribution was this little cutie, very simple and quick and uses less than 15g of wool. Perfect for using up your scraps. I also blogged about my stash busting antics and my 'Yarn Diet' well that failed big time and I'm now the owner of some very nice and lovely to work with 'Cakes' of yarn which I shall share next time with you. My stash increased by 3000g and my totals are out of whack at the moment, but I shall be working on sorting that out shortly.  In the meantime if you would like to make my 'Cutie Pie Purse' then please read on. I hope you enjoy making one, either for a little girl in your life or for charity.


You will need small amounts of DK wool, I used about 10g of the pink and a small amount of the grey plus a 4mm crochet hook

Chain 20 using you main colour

We are going to work both sides of the foundation chain and work in the round

Row 1: start in the 2nd chain from the hook and work 1htr in each stitch until you reach the last stitch. In the last stitch work 3htr, continue to work 1htr in each stitch along the bottom of the foundation chain until you reach the last stitch. In the last stitch work 2htr and slip stitch in to the top of the first htr you created to close the row. Your work should look like this:-


Row 2: ch1, 1htr in to same stitch, 1htr in each stitch to the end, slip stitch to the top of the first htr to close the round, you should have 41 sts

Rows 3 - 12: repeat row 2 making sure to have 41sts at the end of each row.  Fasten of and weave in ends

Row 13: join in your contrasting wool to the back section of your purse by chaining 1 and working 1htr in same stitch, work 1htr in the next 18 stitches and turn

Row 14: ch1, in the same stitch and the next stitch work a htr2tog, this is worked by wrapping wool around hook, insert in to stitch, wrap wool again and pull through stitch, repeat in the next stitch, you should have 5 loops on your hook, wrap wool around hot again and pull through all 5 loops, this is your htr2tog. Work 1htr in the next 16 stitches, htr2tog and ch1 and turn


Row 15: htr2tog, 1htr in next 14 stitches, htr2tog, ch1 and turn

Row 16: htr2tog, 1htr in next 12 stitches, htr2tog, ch1 and turn

Row 17: htr2tog, 1htr in next 10 stitches, htr2tog, ch1 and turn

Row 18: htr2tog, 1htr in next 8 stitches, htr2tog, ch1 and turn

Row 19: htr2tog, 1htr in next 6 stitches, htr2tog, ch1 and turn

Row 20: 1htr in next 4 stitches, chain 3, 1htr in next 4 stitches

Fasten off, weave in ends and attach button. 

Happy hooking x


Thursday, 9 February 2017

Angel Baby Blanket

I decided to have a new format for my patterns. So from today I'm going to post a photo tutorial on my blog and then a written pattern in my Ravelry store, so you can print and keep.

My first pattern in the new format is a tiny 9" x 12" blanket which is to be donated to charities who help parents of angel babies.


I have chosen to use a baby DK yarn approximately 50g, but you could use 4 ply and increase the starting chain in increments of 2 stitches until you arrive at the desired width.

Using a 4.5mm hook chain 34

Row 1: starting in the 2nd chain from the hook, work 1htr in each st to the end, ch1 and turn = 33 sts

Row 2: work (1sc, 1htr) in first st, then skip 1, (1sc, 1htr, sk1) forms the pattern, continue to the last st, 1htr in last st, ch1 and turn.


Row 3: There is little spaces between the stitches, this is where you skipped a stitch and this is where the next set of stitches go. in the 1st space, work (1sc, 1htr)


 then in the next space work (1sc, 1htr) continue to do this till you've worked the pattern in every  space to the end


You can see you are left with an odd looking end of row. this is fine because you will end up if you follow my photo's with a lovely straight edge. Work 1htr in the last stitch, ch1 and turn


Row 4: the pattern is a repeat of row 3 and you will end up with a lovely tight textured finish. Repeat row 3 another 35 times, you should have 38 rows in total.

Row 39: work 1htr into each to end, ch1

Now we create the ruffle border, working in the end of row 39, work 3tr in each row end all the way around 4 sides , sl st to the 1st tr of the border, Fasten off and weave in ends and decorate if you wish.


Close up of stitch


I hope you enjoy making this little blanket, please ask any questions via the comments box should you have any or use the links to get in touch. A written pattern will be in Ravelry store shortly x


Wednesday, 11 January 2017

Cute Baby Jacket

Oh my what a windy day! I was rudely awoken at 3.30 am with the windy conditions. Our dustbins were trying to escape up the street and our small garden table ended up in our fish pond soon to be followed by the 2 chairs. I rescued the chairs and my daughter managed to lift the table out of the pond. Everything secured and hatches battened down yeah! I did think it was supposed to subside by lunch time but as I sit here writing this post I can assure you it hasn't and we are due snow tomorrow. I hope the wind dies down before the snow comes. I joined Slimming World back in October and up to press have lost 1st 8lb so its time to start excersing I thought. I have been doing gentle exercises but now its time to really go for it, so starting yesterday I walked 2.2 miles to our local post office and back to send of my Valentine baby beanies. My plan was to walk 2-3 miles each day, well today that failed. It is so windy you  can hardly stand up, so I thought have a productive day with crochet instead. I made this little jacket a good few weeks ago but never got around to writing down the pattern, so today I have written the pattern and uploaded it to my Ravelry store.  I made it to fit a 12" chest so a baby about 3 - 4lb in weight. I wanted something quick and easy with not a lot of thinking about and I think this fits the bill. It took approximately 25g plus 1 button and it can be made in about an hour. I think this would make great little stash buster and also to be donated to charity. I hope you like it and would consider making one for charity. Be back soon with another pattern, enjoy the rest of your Wednesday x


Monday, 9 January 2017

Beanie Fest!

I mentioned in my last post that I was making little Valentine beanie hats for premature babies around the UK. I make and store items so I can send a box full rather than just a few to save on postage costs. I have had a snaffle through my made stock items and have come up with a box to go today (if the rain stops) to the lovely Janet who runs Crafted with love - donation group Facebook group.  I have updated my charity totals too and so far I have made and donated 373 items. I would love to reach my 1000 makes goal by 31st December 2017. Gonna be busy busy busy but it makes me happy. If you would also like to help the group, just click on the link above or maybe find a group nearer to you and jump on board and make something for charity even if it's just one small beanie. The free pattern for the beanie is in my Ravelry store, just click on the link. Happy crafting on this wet and miserably Monday x


Friday, 6 January 2017

Sweet Valentine

I have recently joined a Facebook group called Crafted with love - donation group the group is run by a lovely bunch of ladies who create and organise donations of handmade items plus shop bought items then distribute them around the UK and also overseas to various charities. They are just coming to the end of a Valentine's hat run. Little beanie hats decorated with a little heart, these will be sent to various maternity units for the new babies born around Valentine's day. I have written a FREE simple pattern which is available in my Ravelry store, should you wish to make one for your local maternity hospital. If you would like the pattern just click on the photo and you will be directed to my Ravelry store. If you would like to join the group and find out more about donating then just click on the name above.  I'm going to take my 3 dogs for a walk now and I will be back later with another pattern for you x


Saturday, 31 December 2016

Stash Busting Pet Blanket

I would like to start of by apologising for been AWOL for most of this year. I have still been crocheting and knitting but its been a strange year. The loss of my friend back in February knocked me for six, my girls growing up too fast and the eldest leaving home for University, discovering a love for caravanning plus lots of other reasons have made 2016 a bit of a strange year, some of it happy but a lot of it sad.  I have felt like I was drowning  in lots of things I wanted to do but neither had the energy or motivation to do so.  My office work space has turned into a shed and I have moved boxes from here to there and back again about 3 times. I have discovered a new love along the way too in Jamberry nail wraps, but more about that later.

So I have made a decision to sort myself out and start 2017 in a positive frame of mind. Strangely enough the Christmas holidays have made me realise how bad things had gotten. I started going to my local Slimming World back at the beginning of October and so far I have lost 1.5 stone (21 lbs) with a long way to go to get to my target weight, but over the Christmas holidays I slipped back into my old habits which made me feel rubbish about myself and sitting here in my (shed) over the last few days has made my mind up for me. It is time to sort out my work space and divide it into my loves of crochet & Jamberry. Slimming World has given my a confidence that I didn't know I had and I have gone from feeling positive to negative over the holidays. Today is the start of all things positive for me and that's the way I intend to keep it.

As things are, right this minute I can't find anything in my (shed) and I want to be able to just go to what I need when I need it. I thought about making it my New Year's resolution but decided that won't work for me, it never has before, so why label it and turn it into a chore. I started bullet journaling a few months ago and I didn't really think that I had that much to write about but I have nearly finished my 1st journal and it is helping me get organised and ready for a new me.  I am working on various new crochet patterns and trying to organise my future with Jamberry.  The idea of this blog was to share with you my followers what I was up to and I haven't, but I have decided that I need you all to help me with my journey through 2017 and beyond. I never thought that anyone would be interested in my ramblings but you all seem to love my crochet patterns and I do have 70,000 kg of stash, so lots of patterns to come. I have made a decision to buy NO more yarn until 2018. Now that is a New Year's Resolution. My 1st offering is a fab stash buster, you all know that I have a few pets and I have a local PDSA pet hospital who always need blankets etc, so I thought lets stash bust a few pet blankets.  I thought granny squares, super easy but not quite what I wanted, then I thought round, lets make round simple blankets which are surprisingly quick to complete.

I started by sorting out my oddments into yarn weights, when I had a number of DK yarn balls, using my trusty winder I set about winding them into one ball. I needed approximately  100g for my blanket, when I had enough I wound them all into one ball and picked up my 4mm hook.


I started with a ch2, then 12tr's into the 1t chain.

Next row: 2tr's in each stitch to leave you with 24 sts.

Next row: work 2tr's in next st, 1tr in next stitch continue to the end to leave you with 36 sts.

Next row: work 2tr's in next st, 1tr in each of the next 2 sts,  should leave you with 48 sts.

You basically continue increasing by 12 sts each row.

I continued until my ball was coming to an end, I ended up with 22 rows using 96g. The completed blanket measures 21" which is perfect for a cat or small dog. Here is Cody modelling her new blanket. She preferred to be under the blanket rather than on top.


All that is left me to say today is Happy New Year to all of you and your families. I hope 2017 is a fantastic year for all!


Wednesday, 2 March 2016

Tribute to a Friend

 Through making items for charity, I made a lovely friend who called Maureen. I would visit as often as I could to have a lovely catch up and to share stories of latest makes and charity needs etc. It was like a day trip, as you could never just pop in for an hour, it was always 4 hours with lunch included. Maureen was a very poorly lady and was more or less housebound, but she was a fantastic lady with lots of friends and a crazy sense of humour. I was making this little cardigan on the day I received a message that Maureen had sadly passed away, so I decided to name this new pattern in Maureen's memory. She was more of a knitter and enjoyed to make toys but she so loved to see what crochet designs I had recently made. I used to save them up so I could take them over to show her. This little cardigan pattern just seemed a nice thing to do in her memory. I organised the pattern on Ravelry and in just two and a bits weeks it has had over 1000 downloads. This makes me happy to feel the that lots of little girls will be wearing my cardigan in honour of such a fabulous lady. If you would like the pattern just click on the photo and you will be taken to my Ravelry store. I would love it if you would download the pattern and make just 1 little cardigan and donate to your favourite charity.


Monday, 1 February 2016

Sweet Little Slippers

I adore making things for babies, wether it is teeny tiny premature garments for my charities or garments for newborns and toddlers. Not only are they quick to make but look so cute when complete that you can't help but go AWW!. These little slippers are no exception. I have tried and tried to make baby shoes using various patterns, but for some reason they just didn't gel with me, so on my every growing list of designs to create were a pair of little slippers. These took a good week to design and I am really pleased with them. Although the photos are for boys I have made these for girls just don't have the right photo to share. The pattern is available in my Ravelry store just click on the top photo.


Monday, 25 January 2016

Jack & Jill Pattern

I crochet a lot for different charities and wanted a little jacket that would suit both a baby boy and baby girl, but also a pattern that didn't take much thinking about, just hook and go. So after playing around a lot with different looks I came up with a cute simple little jacket. The finished size using 4mm hook and Stylecraft Special DK is a 14" chest. I have also made these jackets using lots of different types of DK yarns always with my trusty 4mm hook and each time the jackets turn out slight smaller or larger than 14", I didn't mind this as all babies come in different sizes. The pattern is easy to make smaller by using 3.5mm or even 3mm with 4 ply yarn and if you want a larger jacket use 4.5mm or 5mm hook with Aran, although I wouldn't make an Aran jacket for charity. I have to say these little jackets are quite addictive once you get going. I have done a lacy pattern for a baby girl and a plain one for a baby boy but you can alter the pattern to suit as long as it can fit to 62 sts. Why not download the pattern from my Ravelry store and have a play. The pattern can be found by clicking on the photo's


Saturday, 29 August 2015

Holidays Over

Happy bank holiday weekend everyone. I have just returned from a lovely week camping in North Yorkshire. We have a folding camper called a Dandy and it is so cute. I shall have to take photos next time to show you all. We bought it early July this year and have already been away 5 times in it. All this camping is playing havoc with my crochet though. I always take my crochet with me but for some reason never have time to actually sit and create. So back home now and getting backing into the swing of things. I have a very cute little girl poncho that I'm trying to finish and also a new idea for a baby blanket along the lines of a granny stripe but slightly different. I hope to have both some where near finished and being able to be photographed this week so I can share. In the meantime I have completed my pattern for my summer wrap and it is now for sale in my Ravelry store just click on the "Summer Wrap" link if fancy a look.


Monday, 10 August 2015

Ladies Chunky Headband

Morning everyone. A huge thank you first of all for everyone who has popped by to read my blog. I was extremely happy this morning to see I have had over 5000 visitors. So today I want to share with you my latest make. I am not usually a big fan of chunky yarn, but I purchased 8 balls of Stylecraft Brushstrokes in various colours. It is a wool, mohair and acrylic mix yarn which works up really well. I had cowls and headbands in mind when I bought it and it has been on a shelf in my studio for about 6 months now so it was time to create something. I designed this very easy headband with an optional flower the other day while I was waiting for my hubby at the doctors. I tend to wait in the car so that I can keep on crocheting. Anyhow I was sat there merrily watching the world go by and crocheting away and when hubby came back to the car I had finished my headband. 45 minutes is all it took without the flower. I was very pleased with how it turned out. I had the pattern in my head so promptly went home to write it down. I was amazed that out of 1 x 100g ball I got 2 headbands with flowers and enough left over for just the flower which I shall turn into a brooch. This headband is so quick it would make great gifts especially with the dreaded colder months approaching soon. I think I'm going to make a matching cowl too.  My eldest daughter Abi kindly modelled the headband for me.


The pattern is available in PDF format 

Ravelry  - Easy Chunky Headband


Friday, 31 July 2015

Lacy Textured Infinity Scarf

Well I know I'm a day early, I was supposed to upload tomorrow but the sun is shining at last and I felt like getting my head around a few patterns and things I really need to get finished. So do you remember my 'Lacy Textured Infinity Scarf' that I created for the July yarn club over at Dexter's Rainbow well I'm glad to say it had really good reviews and it is now officially for sale from my Ravelry store, just click on the photo if your interested. I have made this scarf so many times it is a real favourite and the beauty of its you can make it for gifts all year round and what with Christmas soon approaching (I know I'm sorry) it would make a lovely handmade gift.


I have also finished my 12 point star blanket in white, blue and silver and I shall share that tomorrow when I have sorted out weaving in the ends and taking photo's. I hope the sun is shining where ever you are in the world, we have been waiting a long time for it so I'm going to sit in the garden while weaving in my ends. Happy Friday everyone x

Tuesday, 28 July 2015

Where has July gone!

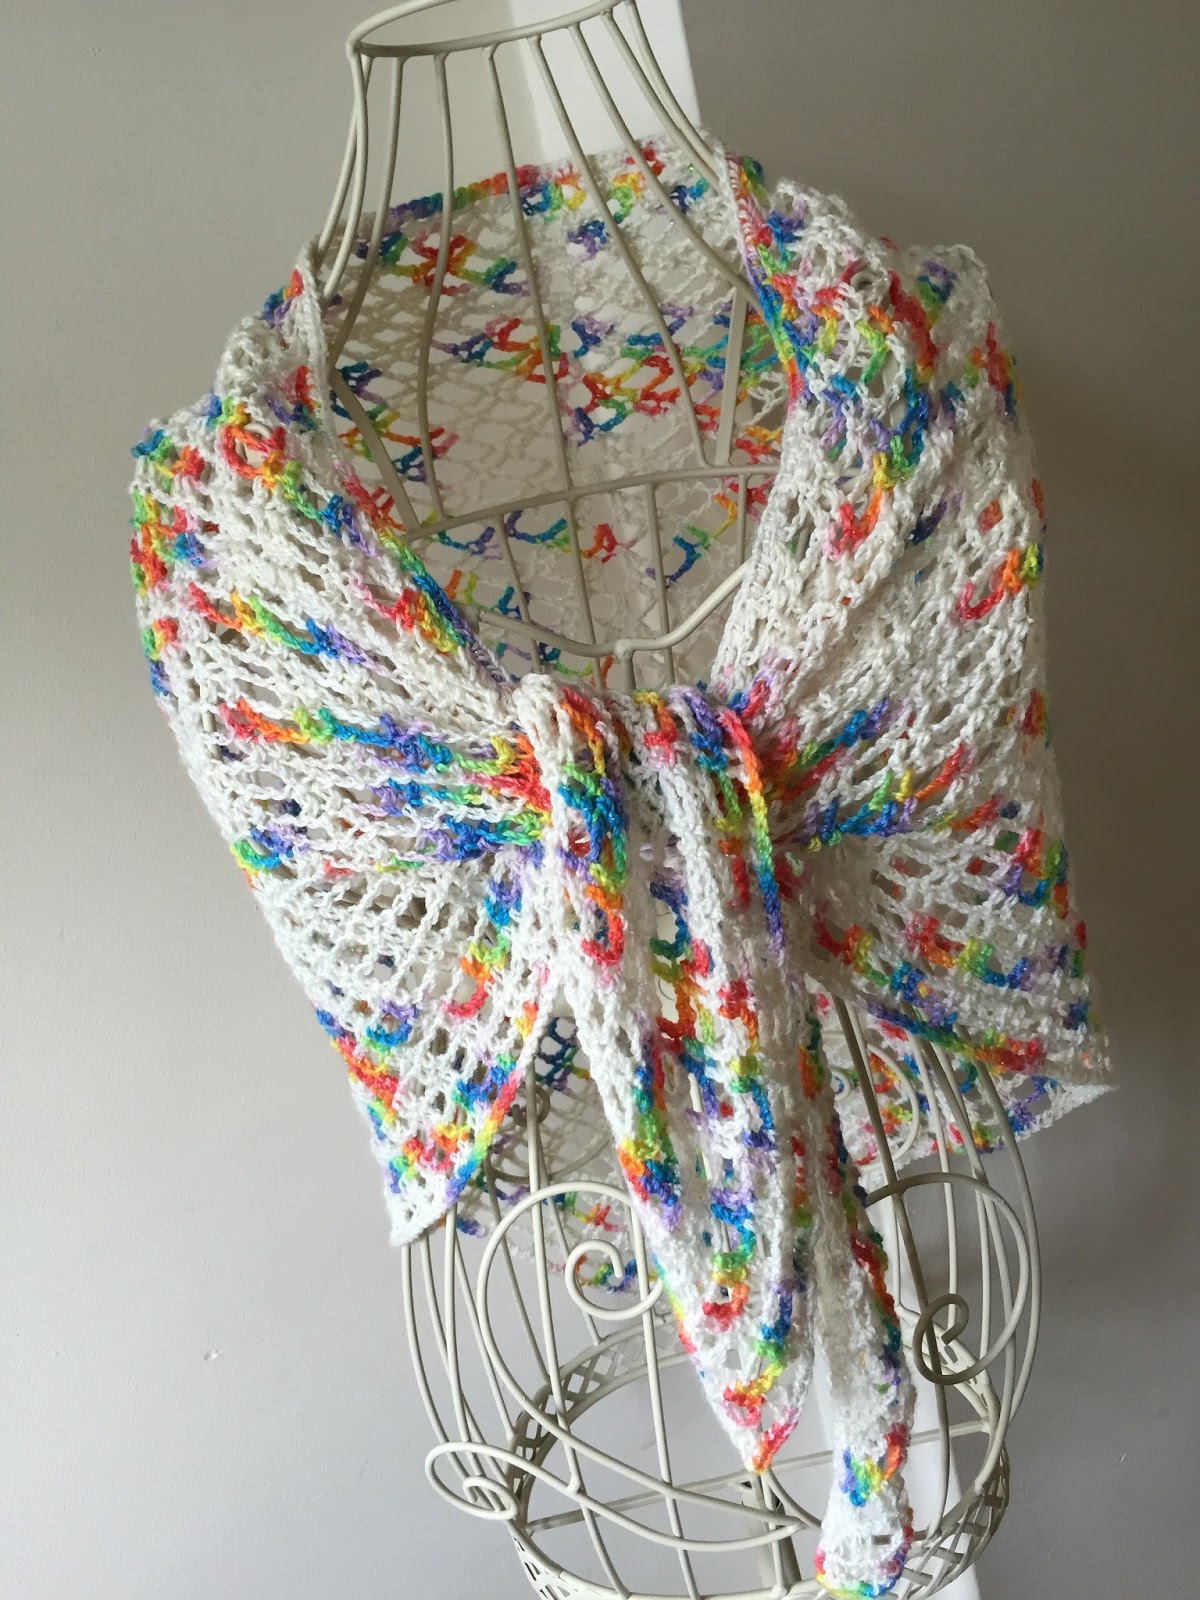
I have only just realised that July is more or less over with, where did it go? It would have been nice if we had had some sunshine, but it looks like August may pick up yeah! I have been super busy with new projects, trying to catch up on older projects and I have been away in my Dandy (more on that to follow). Has you all know I write patterns for Dexter's Rainbow who has a monthly yarn club. Well this month Tracey sent me 100g of beautiful super wash merino in a colour way called 'Rainbow Flash'. the wool is a very fine 4 ply with a little sparkle in it. I must admit I did struggle at first with a design but we had agreed on a summer wrap and that is all I had in my head, so I set about playing and I would start a design only to find I didn't like it, so after 3 maybe 4 attempts (and nearly sending it back) I came up with my 'Summer Rainbow Wrap' Now I have a called it a wrap but when I have been taking pictures and posing the wrap I discovered that it can actually be worn in various different ways which I am really happy with because I'm not much of a wrap kind a gal but I do like a scarf. It can also also be worn as a sarong on the beach. Here it is I hope you like it. The pattern is included in the August yarn club packs over at Dexter's Rainbow and shall be on sale in my Etsy shop from 1st September.


Monday, 29 June 2015

My New Venture

I have my new venture to share with everyone. Last month I was on a Facebook page that I like called Dexter's Rainbow, drooling over the most gorgeous hand dyed yarns when I got a talking with Tracey the owner. Tracey runs a monthly yarn club and asked me if I would be interested in writing a pattern each month using her fabulous yarn. Obviously I said yes, I have patterns rolling around in my head and thought it about time they were put on paper. So along came Mr Postie a few days later with this beautiful 100% merino tweed in DK.


The colours of this design "A Misty Walk" were just up my street and I couldn't wait to dive in. I already new what I was going to make but being my first professional pattern I did have to play around a little to get it just right with 100g, but in the end it worked out beautifully if I do say so myself.

This is my 'Lacy Textured Infinity Scarf' the pattern is available as part of the July 2015 yarn club over at Dexter's Rainbow then it shall be available to purchase online via my Etsy shop from 1st August 2015.

If anyone is interested in being part of the July 2015 yarn club were you get 100g of the merino tweed along with the pattern to create my 'Lacy Textured Infinity Scarf" and get to choose your own colours if the above doesn't tickle your fancy and free postage then please pop over to Dexter's Rainbow have a drool over the lush yarn the click on the pinned post regarding the club, alternatively you can message me or say hello to Tracey on her page. 


Tuesday, 14 October 2014

Crochet Therapy

Morning, I haven't posted for a few days due to Hubby still being in hospital. He is awaiting a decision on a heart bypass, the decision is being made by surgeons in Leeds and he is in Bradford so waiting, waiting and a bit more waiting. On the up side he is allowed to come home each day then go back to the hospital at night. He jokes its worse than being a prisoner. I must admit it feels very strange picking him up on a morning then drop him back off at night, but thats what we after to do to keep his space on the list so to speak. Anyhow in-between being a taxi service along with everything else that needs to be done I have tried to have some crochet therapy, some would think it is cheaper than a spa day or an actual therapist but I'm not so sure, my stash of yarn seems to multiply on its own. I have been good this last week and not bought anymore. I have been commissioned to make a cot blanket for a new baby due soon, I'm about a third of the way through but I can't just do the one project so I do some work on the blanket then pick up something small to do. I recently made a baby beret which I blogged early and have spent a few hours writing up the pattern which is over on my free patterns page. It was my small thing to do last night.  Free pattern here.

My next free pattern is going to be a bottle gift bag so keep watching this space as they are perfect for Christmas.

Friday, 12 September 2014

Rainbow Blanket

Happy Friday everyone.

I have not blogged for a little while due to family illness but while its been a stressful time at home I have still been hooking. My youngest requested a blanket for her bed in rainbow colours so I looked through my stash and came up with this beautiful blanket. I wanted something that would make up in one go with minimal weaving in of ends ( I loath that bit) and here it is HOTH (hot of the hook). I had to finish it today because Rebecca said she really needs to sleep with it TONIGHT!.

Although this blanket now belongs to Rebecca and I will probably never see it again, I am putting it in my crochet shop to have made to order. If anyone would like me to make them one then just drop me a message. To make takes approximately 50 hours, this one took me four weeks to complete so please remember that if placing an order. I do have an order book and all large blanket orders are completed on date placed basis. I hope that makes sense.  Anyway here it is and I hope you like it.


I can make this blanket in pram, cot, single bed or double bed size and also in various colours, this version is rainbow but I have other colours too which shall be in my shop soon. Any questions or commissions please drop me a message.

This is the pattern.

I choose 13 different colours of Stylecraft Special DK and a 4mm hook.

2 x 100g for the stripes and border colour choice and 12 x 100g for the stripes.

I used the following stitches - tr, htr, V stitch, ch

V st = tr1, ch1, tr1 in same chain.

To begin chain 163, work 1tr into the 3rd ch from the hook, *skip 2 ch's and work a V st into next ch* continue from * to * to last 4 ch's, skip 2 ch's, tr1, tr1.

Row 2: Ch2 (counts as 1st treble), tr1, then work a V st into each ch1 space along the row to last 4 ch's, skip 2, tr1, tr1.

Row 3: repeat row 2 until desired length achieved.

Border - change colour and work 1htr stitches all around the blanket, I worked 1 in each ch along the top and bottom and two in gaps down the sides.

Change colour again and work 1htr into each ch, in the corners make a ch1 to continue around.

I worked two rows for the border but you can make it as thick as you prefer.

I worked 3 rows of pattern per colour but you can work as many as you prefer.

I hope all of that makes sense but please message me if I have made a mistake and I shall update the pattern, I have written the above from memory because I forgot to write it down as I went.

Happy hooking Friday on International Crochet Day 2014.

Sunday, 24 August 2014

Mini Crochet Innocence Hat

I have written my crochet pattern for the little innocence hats and you can find it here. I find these little hats quite relaxing to make and if using just one colour they can be made within about 10 minutes. I made 36 with little pom poms then decided to make more with little flowers. These little beauties shall be mailed on to the Age Uk shortly to be included in this years The Big Knit event (even if mine are crocheted there will still be a new home out there somewhere for it).

If you are interested in taking part please follow this link http://www.ageuk.org.uk/get-involved/ev ... -big-knit/


Saturday, 9 August 2014

Twisted Neck Warmer

I recently joined the ladies at Loving Hands who create beautiful knitted and crocheted items for charities all around the country. I have started my own personal challenge to make 1000 items for various charities. 

The other day I started making something with no written pattern it was just in my head and I wasn't sure if it was going to be a blanket, scarf or nothing at all. After about an hours playing it started to transform itself into my new creation. 

I was thinking about the elderly and wanted something useful and that didn't take an age to make. While doing a bit of research someone mentioned that no buttons or ribbon should be used for obvious reasons. So I created my neck warmer which is joined at the ends (a bit like an infinity scarf but shorter) it then just pops over their head and sits like a collar. I think it looks fab and can be worn indoors or out.

This is my Twisted Neck Warmer


I worked this design vertically and it seemed to work up pretty quick, it took about 3 hours. 

Note: at the end of each row you work ch2 to act as your 1st tr. I prefer to only ch2 but you can ch3 if you prefer.

DK Wool and 4mm hook

R1: Chain 152 and work a full of trebles starting in the 3rd chain from the hook.

R2: Chain 2, miss the next 2 ch’s, work (tr1, ch1, tr1) in next ch, work this way to the last 3 ch’s. Work tr1 in last ch.

R3: Turn and ch2, work (tr1, ch1, tr1) in each ch1 space to the end of the row, work tr1 in last ch.

R4 - 10 - repeat row 3

R11: turn and ch2, work a full row of trebles to the end.

I twisted my neck warmer so that it sits like a collar but you can just join the ends together without twisting if you prefer.

To finish off I twisted the ends then crocheted the two ends together by working a 23 single crochet to the end. fastened off and weave in the ends.

This is my very first attempt at writing a pattern for other people to follow, so please feel free to use this pattern for yourself and let me know if I have missed anything or written it wrong.  

Challenge 5000 Update

Happy Sunday morning, sun is shining for a while at least so I thought I would give you my first update. July was a slow month due to oth...